Vehicle Module Update Procedure When Asbuilt Retrieval Fails
This instruction applies only when Asbuilt data retrieval fails and you need to update the current vehicle module. Please read all instructions carefully before operation.
Scope of Application
- This vehicle module update procedure is only applicable when Asbuilt data retrieval has failed and the current vehicle module needs to be updated.
- If Asbuilt data is retrieved successfully, clicking Request will run the original default update procedure instead of the alternative procedure described here.
Note: This procedure is an auxiliary solution for Asbuilt retrieval failure. It does not mean that all modules are suitable for downgrade or old-version flashing.
Function Location
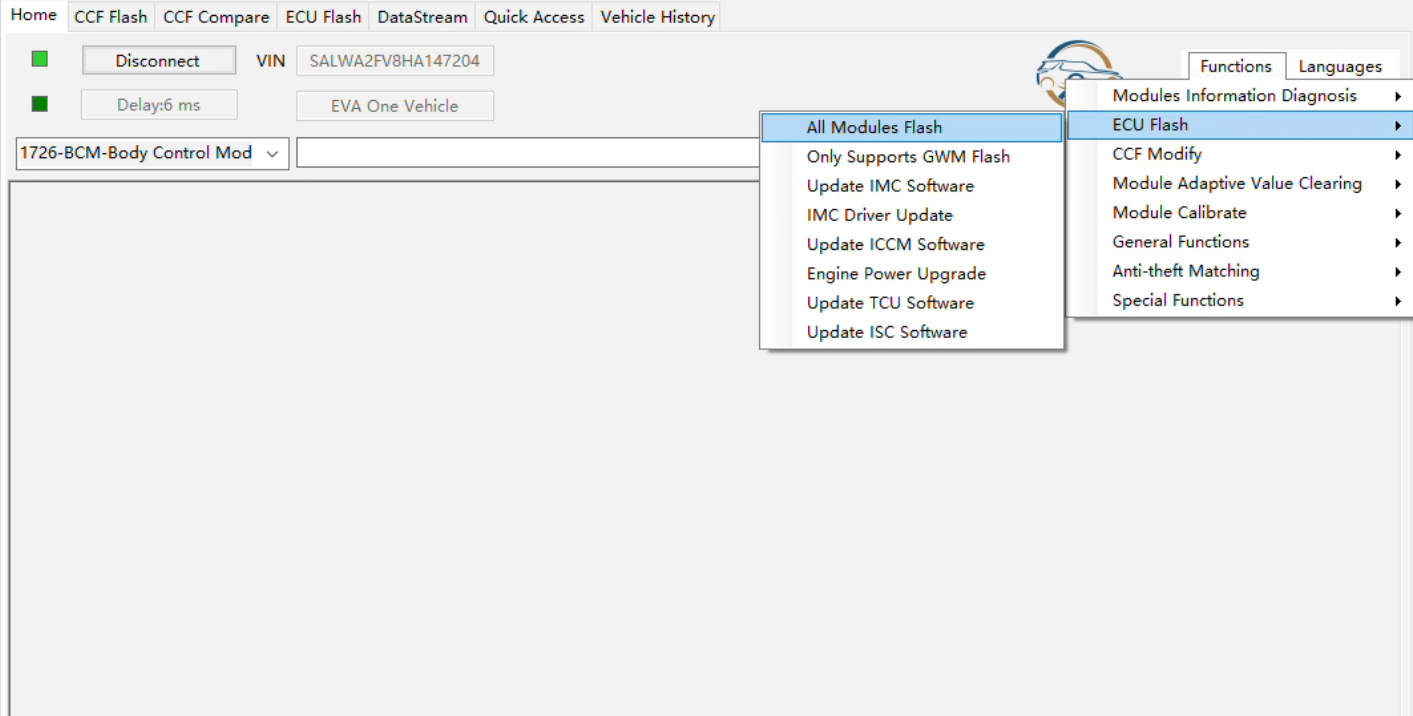
Function path: Home -> Functions -> ECU Flash
- If you need to perform the operation for the GWM module, select: Only Supports GWM Falsh
- If you need to perform the operation for modules other than GWM, select: All Modules Flash
- Dedicated module update procedures are not supported here, such as: IMC, ICCM, ICCMB, ISC, EVA2 type TCU, and other previously declared modules.
Query the Module Assembly Code
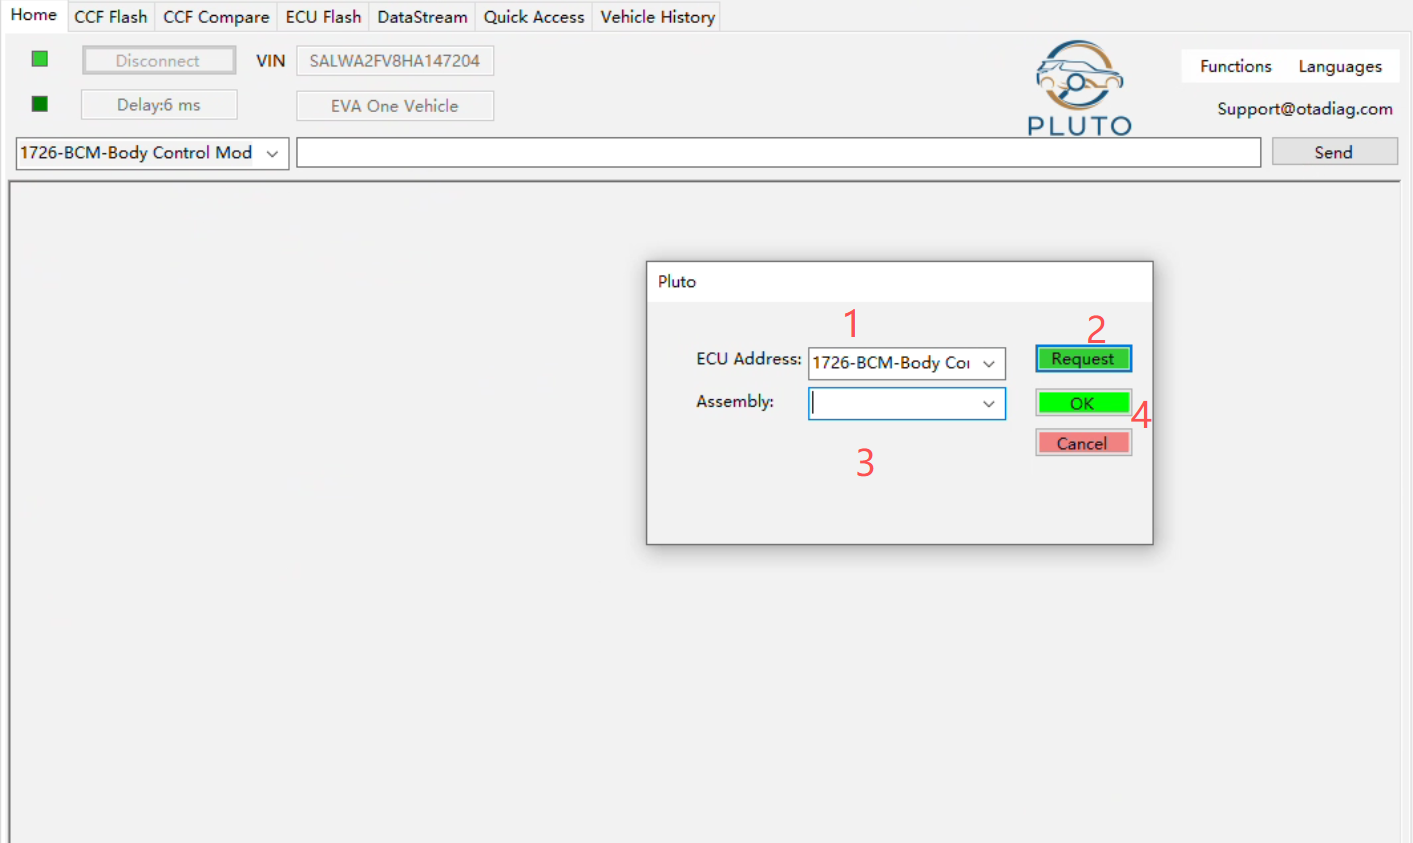
- After clicking to execute, a new operation screen will appear.
- According to your requirement, select the module you need to query from the drop-down list in the ECU Address field.
- After selecting the module, click the Request button.
- The message log area on the main screen will start displaying the vehicle module reading process and query results.
Important: If you manually enter any parameter in the Assembly field before querying, this procedure will not be executed. The system will search for available updates based on the parameter you entered.
Select an Executable Version
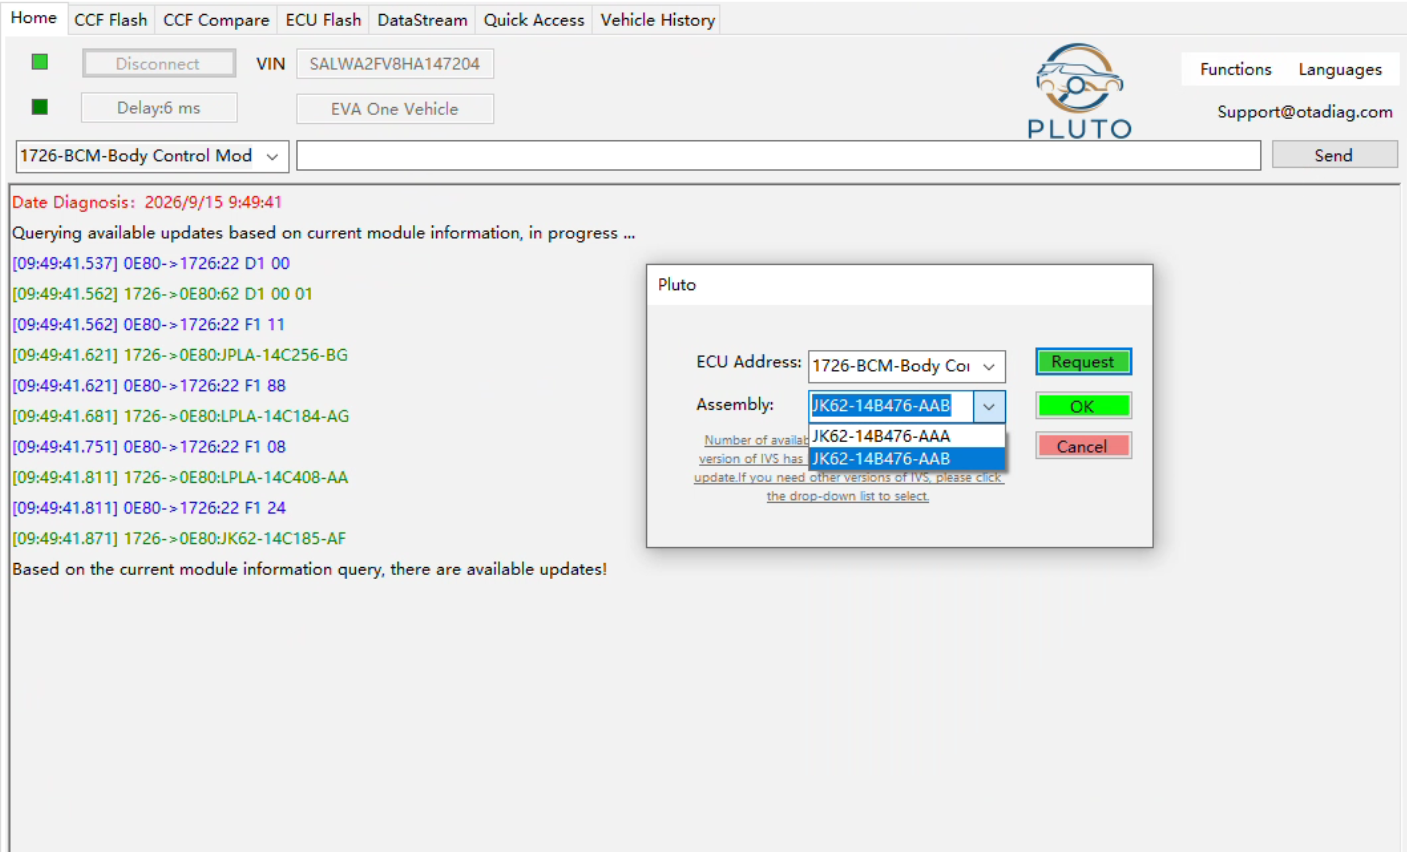
- Once results are found, they will be loaded into the Assembly list.
- You can select the version you want to execute from the drop-down list.
- If you need all available update versions, including previous old versions, modify the last digit of the queried IVS code to A, then click Request again.
- The system will query all available versions based on this IVS code, up to the latest version, and load them into the list for selection.
Warning: Some modules are not recommended to be flashed with older software. Examples include modules with signature verification or modules that internally compare software versions. After flashing an older version, these modules may report a fault during data verification and saving, such as 31 01 03 04. In that case, the written data cannot be saved and will be discarded.
Functions Affected by Asbuilt Retrieval Failure
When Asbuilt retrieval fails, the following two functions will be affected:
- Anti-theft integrity configuration
- Replacement of a brand-new module
For these two situations, follow the instructions below.
Replacement of a Brand-new Module
- If the original module can still communicate, first use the procedure above to obtain and record the corresponding Assembly code of the original module. After installing the brand-new module, run this function again, manually select the original module address, enter the previously recorded Assembly code, and click OK to execute. Do not click Request. This will write vehicle-applicable data into the new module.
- If the original vehicle module no longer exists or cannot communicate, send an email to support to query the available module Assembly code. The email must include the vehicle VIN, required module, and repair content, so that support can reply with a complete solution in one response.
Anti-theft Integrity Configuration
The following procedure applies to anti-theft integrity configuration involving replacement of BCM / GWM / KVM.
- First back up the original vehicle CCF. This can be done through Home -> Functions -> CCF Modify -> CCF Parameter Changes -> Backup, or by clicking Read CCF on the CCF Flash page. After completion, select the current vehicle type parameter in Save CCF type, then click Save CCF in the lower-right corner to save the data.
- Use the Asbuilt-failure query procedure above to read and record the Assembly codes of the current vehicle. The modules that must be recorded are: BCM, GWM, and KVM.
- After installing the brand-new BCM and KVM, enter the recorded Assembly codes according to this procedure and update BCM, GWM, and KVM.
- Load the backed-up local CCF file through the CCF Parameter Changes or CCF Flash page, then perform CCF restore or CCF write to write the CCF data into the brand-new BCM module.
- Optional: If the installed BCM is a used unit and contains another vehicle VIN that does not match the current vehicle, before performing step 3 you may use Functions -> Module Calibrate -> BCM Rest to restore BCM EEPROM and clear the VIN record. If this function fails, it means the BCM software version may be the latest version and JLR has disabled this function. You may try downgrading the BCM version first and then performing this function again. For BCMs from 2026 onward, this function has already been disabled in the initial version and cannot be used.
- Optional: If you also replaced the smart key, check whether the new smart key configuration is compatible with the vehicle. If UWB / STA is enabled in the vehicle CCF, you need to prepare a brand-new high-specification D-type smart key. Otherwise, disable the UWB function in the CCF before continuing. The smart key mentioned here refers to the new-style key, not the 2010-2017 smart key.
- Execute Home -> Functions -> Anti-theft Matching -> Immobilization to synchronize the vehicle anti-theft identifiers.
- Execute Home -> Functions -> Anti-theft Matching -> Keys Matching, and select brand-new keys inside the function for configuration.
After completing the required steps above, try to start the vehicle. If the vehicle cannot start, check the vehicle DTCs and read the BCM Authorisation status to analyze and inspect the anti-theft status.
If the vehicle starts normally, perform
Home -> Functions -> General Functions -> Module VIN Lear
for BCM / KVM / GWM to complete module VIN learning.
Also check whether the vehicle has an electric telescopic steering column. If yes, perform
Home -> Functions -> Module Calibrate -> Calibrate Steering Column.
If only BCM / GWM is replaced and KVM is not replaced, the KVM update and key configuration steps mentioned above do not need to be performed.
However, during the Immobilization process, make sure all keys originally configured to the vehicle are inside the vehicle and can be recognized normally.
Summary
The above instructions describe the vehicle module update solution when Asbuilt retrieval fails, as well as the recommended handling procedure for complete anti-theft configuration. Select the proper workflow according to the actual repair content, and confirm stable vehicle power supply, normal module communication, and complete recorded information before flashing or configuration.